How to add a digital signature to a Word document
Find out how to add an electronic / digital signature to a Microsoft Word document.
Electronic signatures have revolutionized the way we process documents. What once required pen and paper can now be done with digital tools.
Electronic signatures are not a new concept. They have been developed for decades, for example in fez machines in 1980. Today, electronic signatures are more sophisticated.
They often include a digital encryption key to verify the identity of the signer and establish a legally binding confirmation. Since electronic signatures are legally recognized, they can be used in almost any document, such as business agreements, real estate contracts, loan applications, etc.
You can add electronic signatures to a variety of file types, including Word documents, PDF , Excel files and even PowerPoint slides. This guide explains how to add and remove an electronic signature in a Word document.
But let's start by defining what an electronic / digital signature is.
What is an electronic / digital signature?
An electronic / digital signature has a fairly flexible legal definition. In the eyes of the law, an electronic signature is a sound, symbol, or electronic process, attached or logically associated with a contract or other document and performed or adopted by a person with the intention of signing the document.
This definition is very general, as it covers a wide range of possibilities. However, in the case of Word documents, the concept is much more concrete. When someone digitally signs a Word document, they place an encrypted authentication stamp on the file, along with a visual representation of their signature.
This digital seal guarantees the authenticity, integrity and notoriety of the signature. Concretely, it replaces the traditional physical signature of your name on a document to confirm its validity.
How to add electronic / digital signature in Word
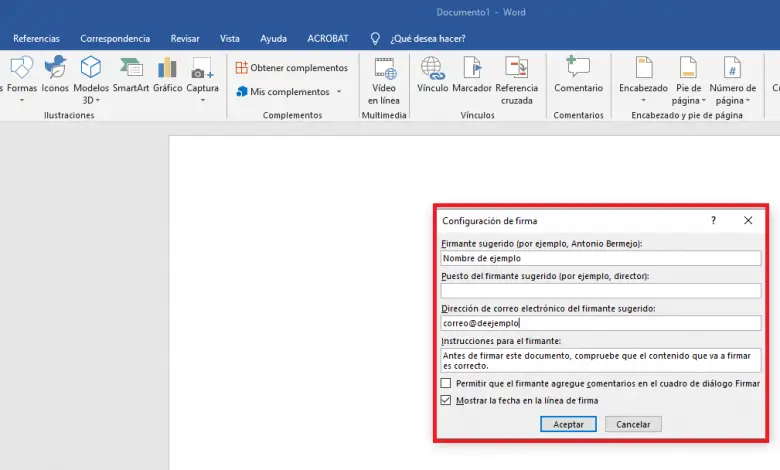
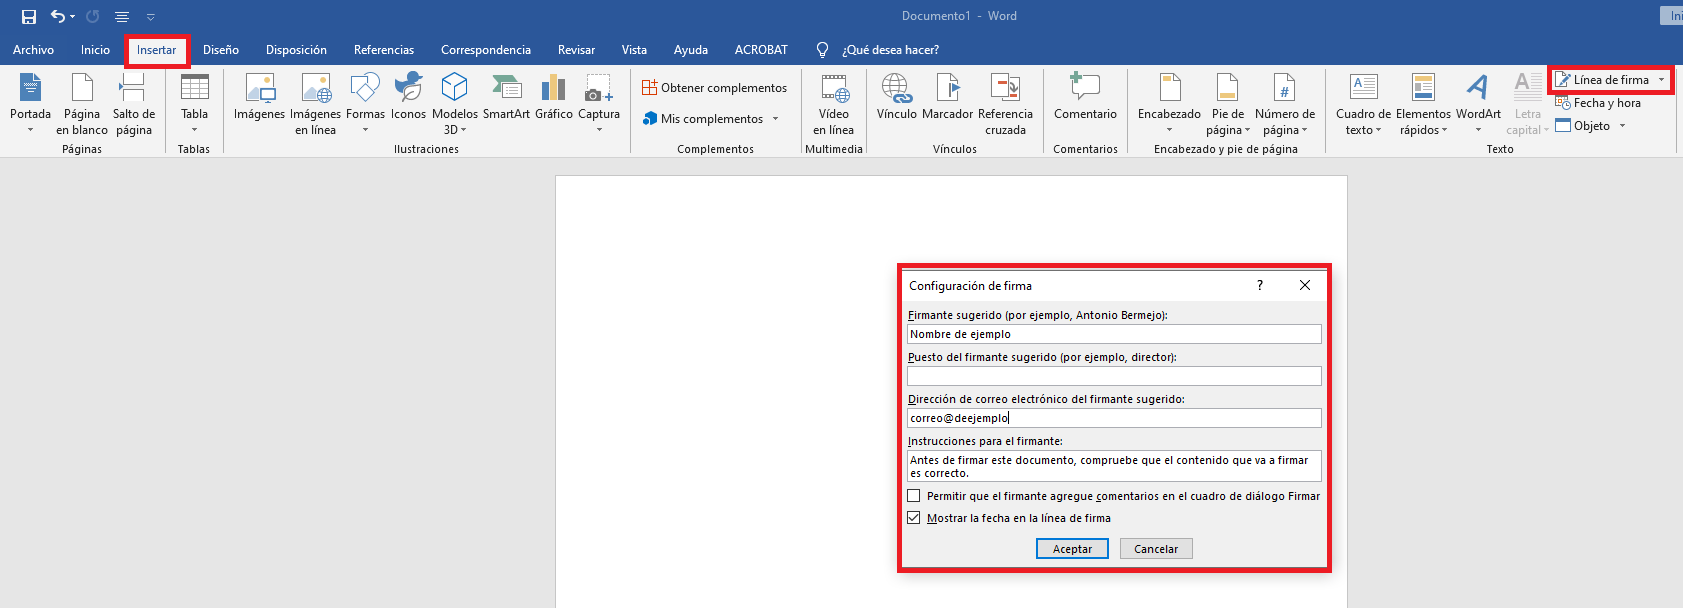
To put a digital signature on a Word document, open the document and move the cursor to the space where you want to insert the signature. Once there, in the "Insert" tab, click on the "Signature Line" option, followed by "Microsoft Office Signature Line". Then complete the Signature Settings window.
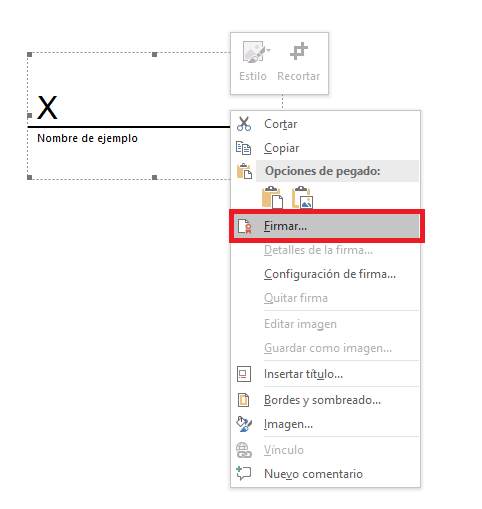
Once the settings are accepted, a signature line will be added to the Word document. Now right click on it and select "Signature".
You need a digital certificate to formalize the signature
To add electronic / digital signatures to your Word documents, you need a signing certificate. This certificate confirms your identity. It is included with a public key when you send a digitally signed document.
Digital certificates can be obtained through an official external authority or by creating your own personal certificate. While an official external certificate is more legal, to put it another way, creating your own can also help.
On Windows, depending on the version you have, the way to create your own certificate may be different. Have a look on Microsoft's help to create your own certificate .
Recommended item: learn to align and justify texts in Word
Put a signature place so that other people can sign the document
As explained above, in Microsoft Office Signature Line Settings, you can add instructions to create a signature line. This way you can send the document to someone else to sign it with certain instructions. Remember: Insert -> Signature Line -> Microsoft Office Signature Line -> fill in the fields in the Signature Settings window.
The signature setup window contains fields that specify the signer's name, job title, email address, as well as the ability to add signing instructions. In addition, you can enable the checkboxes to include the date of signing and the option to add comments from the signer.
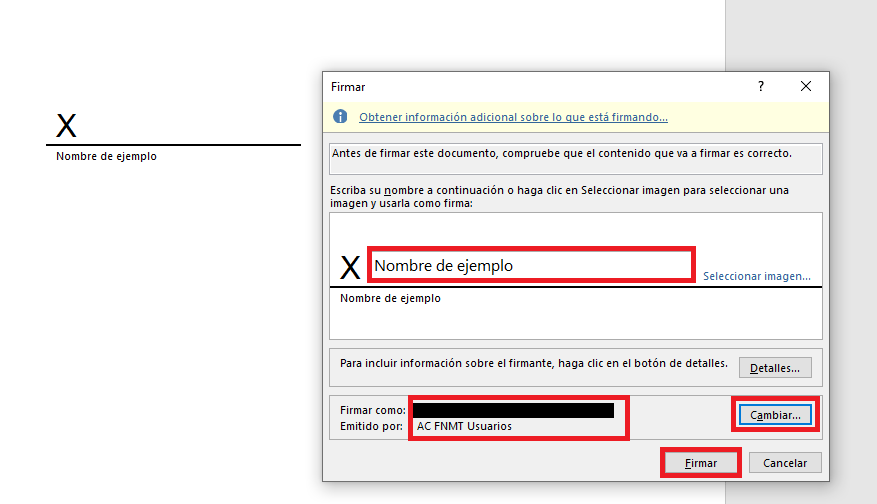
The other person would just have to right click on the signature line and select “Signature”. Microsoft Word allows two document signature options, you can choose to add a text signature by typing the name next to the X or selecting an image, as well as a digital electronic signature as mentioned above.
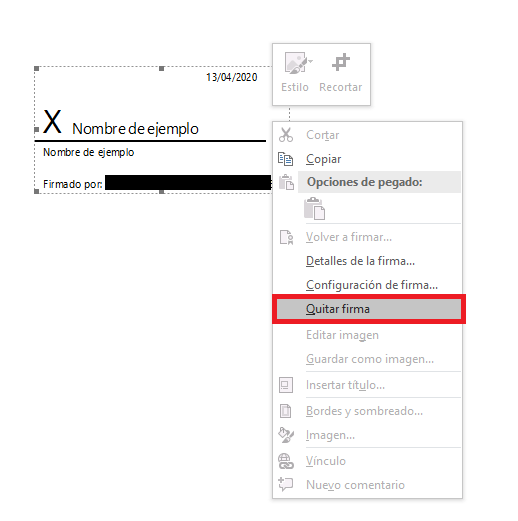
If you want to remove an electronic / digital signature from a Word document, right click on the signature line and select “Remove Signature”.
Possibility to put an invisible / hidden signature
Unlike the signature lines mentioned above, an invisible / hidden digital signature does not add any markup or text in the document. The invisible digital signature adds only a few metadata to the document file. This metadata is a way to guarantee the authenticity of the document without altering its content.
Visible and invisible signatures involve the use of metadata. A visible signature includes metadata and a visible stamp in the document, while an invisible signature attaches only the metadata, thus protecting the integrity of the document.
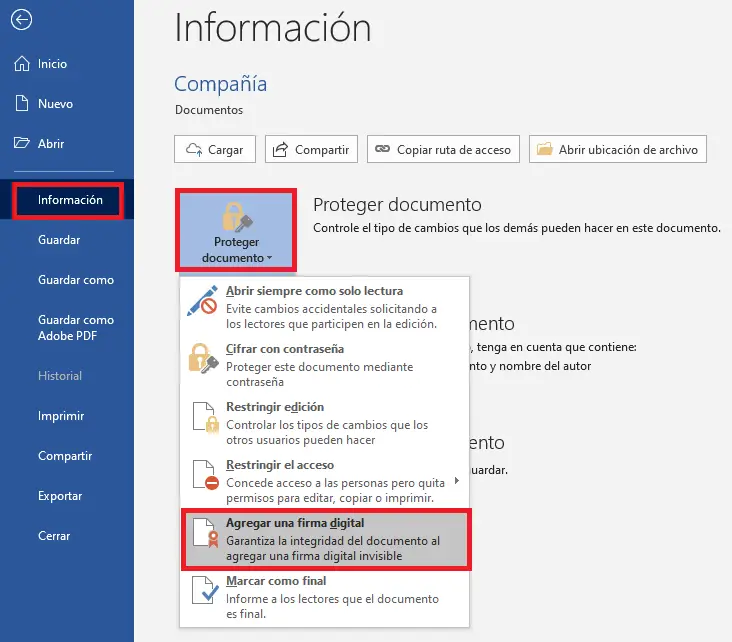
To add an invisible electronic / digital signature to a Word document, click on the "File" tab, then select "Information" then "Protect document" then select "Add a digital signature".
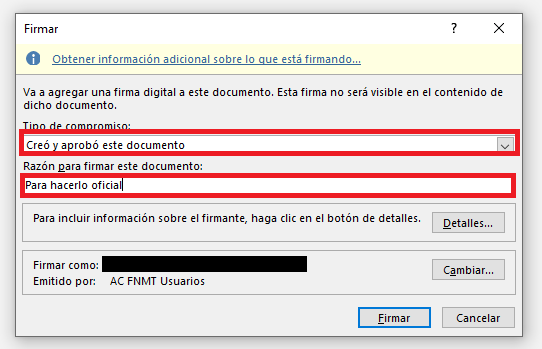
Now select the type of engagement, as well as the reason for signing, and press the “Sign” button to finish.
Once the file is digitally signed, the document will become read-only to prevent changes. A Signatures button will also appear to be able to delete it if you wish: file -> information -> see signatures -> click on the arrow next to the name of the signature -> delete the signature.

If you are not sure which type of signature to use, you should add a visible signature, this is the most common, and the document will be suitable for printing.