Run Powershell scripts with keyboard shortcuts!
Configuring scripts Powershell in Windows 10 has its advantages, as they allow you to run specific commands at any time or easily manage scheduled tasks, or even activate them with keyboard shortcuts.
If you are a power Windows user, you have probably discovered the potential of the Windows 10 PowerShell platform and want to take advantage of the functions that you can design yourself with simple scripts.
Functions can be organized automatically, but if you still want to be able to perform them with keyboard shortcuts, we've got good news. However, we caution you that there are some limitations, but none of them make the process too cumbersome.
Configure the script
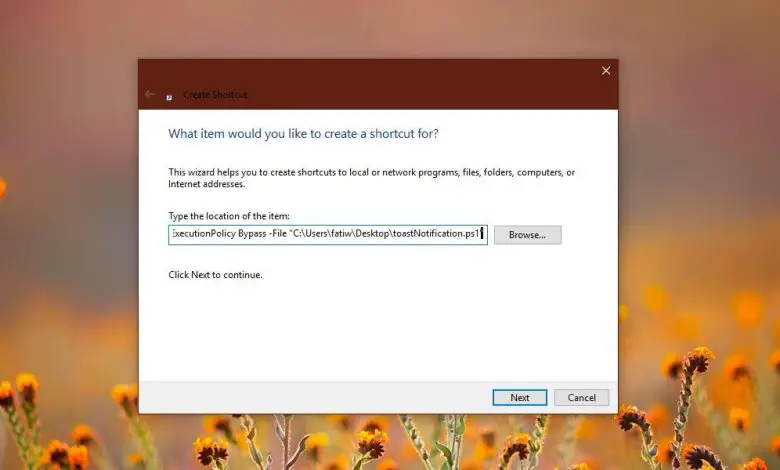
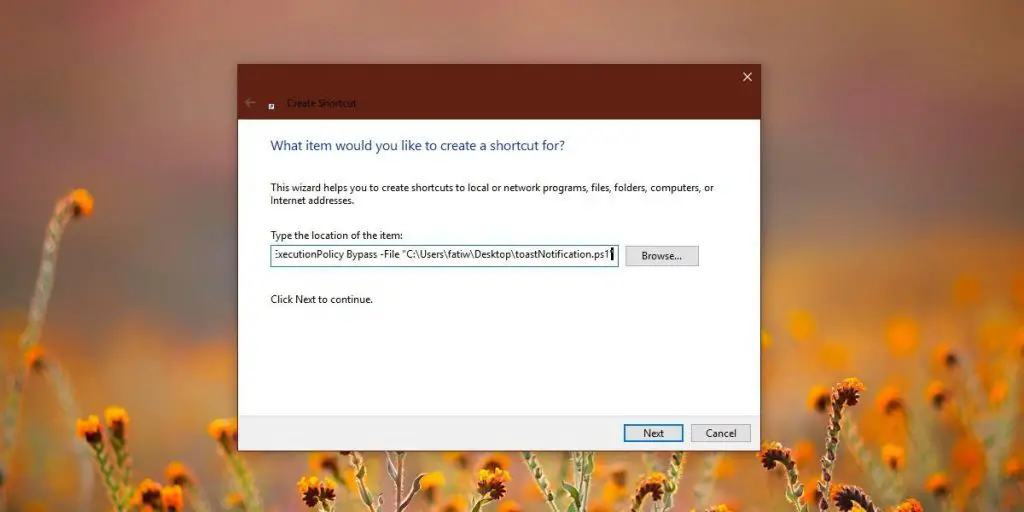
The first thing you need is the Powershell script. Take your time to create it. Once you've finished it, move it to a place where you can easily locate it, being careful not to accidentally delete it. Go to your desktop and right click on an empty area. From the drop-down menu, select "New" and "Shortcut"
In the Location field, enter the following, making sure to replace “Script Path” with the full path of the script you created earlier and want to run with a keyboard shortcut.
% SystemRoot% \ system32 \ WindowsPowerShell \ v1.0 \ powershell.exe -ExecutionPolicy Bypass -File "Script path"
Examples:
% SystemRoot% \ system32 \ WindowsPowerShell \ v1.0 \ powershell.exe -ExecutionPolicy Bypass -File "C: \ Users \ John \ Desktop \ ScriptTest.ps1"
Defining keyboard shortcuts
Click "Next," then enter a name for the shortcut. If you want, you can also change the icon used by the shortcut; will use the Powershell icon by default.
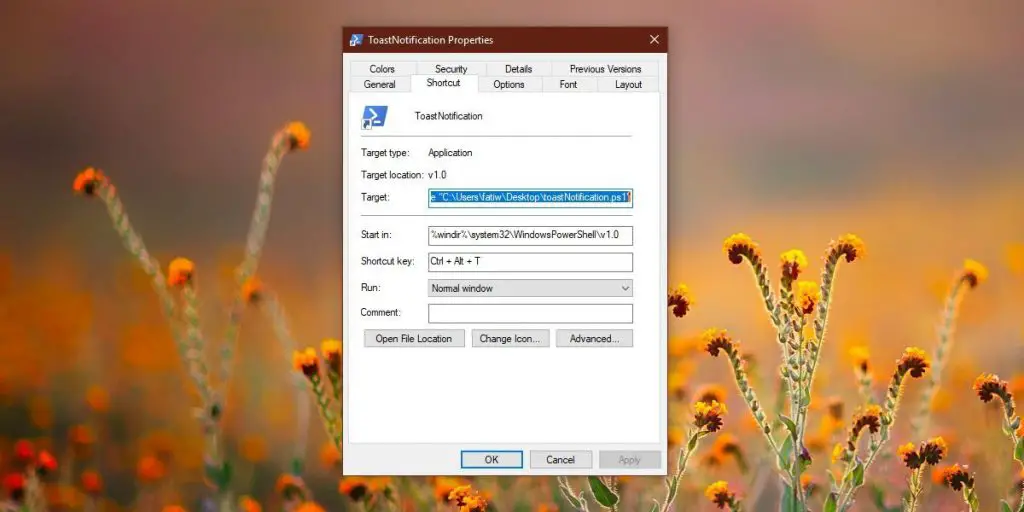
After creating the shortcut, right-click on it and select “Properties” from the drop-down menu. Find the "Shortcuts" tab and click. The next thing will be to select the “Shortcut key” field, where you can set the combination of keys you want to run the application with just a movement of your hand.
You will need to enter a letter or number. The Ctrl + Alt keys will be added by default and will be part of all possible configurations for keyboard shortcuts, regardless of the application.
With that, you will have correctly configured the keyboard shortcut for your script. Feel free to try it out and replace the key with the one that suits you the best. Otherwise, you can leave it at that.
limitations
We mentioned earlier that there are some limitations to this procedure, which still do not compromise the functionality of the shortcut. The shortcut you created for your script should always stay in the same place. If it is moved from its original location, to another folder, or outside of your computer, the keyboard shortcut will stop working.
The best way to avoid conflicts is to keep your scripts on your desktop, in a dedicated folder, or to hide them. Trying to add them to your taskbar will not work, nor to add it to the Start menu bar.
As long as you keep this small limitation in mind, you can make full use of your script with the assigned keyboard shortcut.
Good luck setting up your scripts!