How To Fix High Disk And CPU Consumption In Windows 10
We have surely noticed on several occasions how the performance of our computer has been significantly reduced. At this point, the first thing most people tend to do is open Windows Task Manager and find the person responsible for the situation. While we may have the issue with any of our apps, it is quite common that we have the issue with the process. SearchIndexer.exe and it is responsible for excessive use of the disc and the processor in Windows 10 . Next, we will show some recommendations and steps to follow for solve the problem of high disk and CPU usage in the system.
First of all, it is convenient to know that SearchIndexer.exe is a Windows service that provides the content indexing and that, therefore, it is the one that helps the system to display the results of the file searches that we perform. Surely you have already thought about the possibility for Windows to quickly return the results of any search on the computer, well, it is thanks to the fact that this service runs in the background to make it easier.
How to fix high disk and CPU consumption issues in Windows 10
However, sometimes the SearchIndexer.exe service can be the one that performs high disk and processor consumption and therefore affects the performance of the computer. If this happens, the first thing we can do is restart the Windows search service.
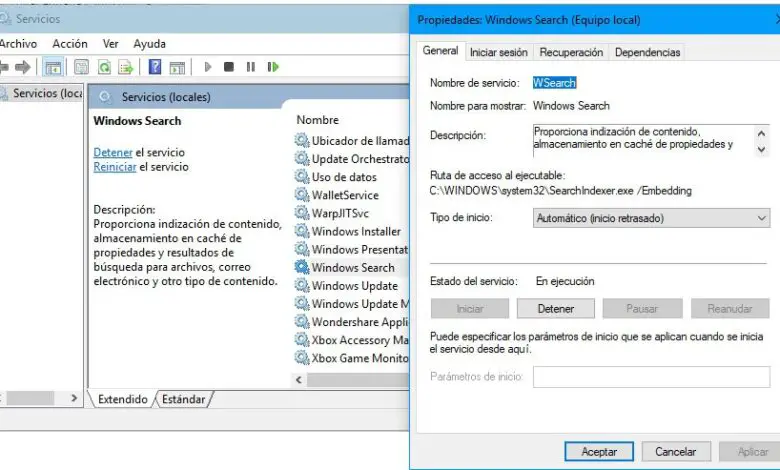
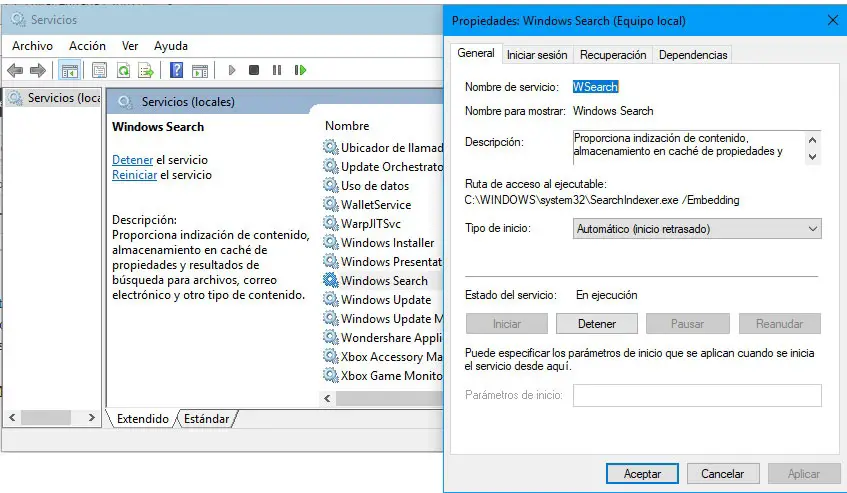
To do this, run the services.msc command in a Run window (Win + R) to open the service manager, locate the service Windows Search and by right clicking on it, we access its properties. This will open a window where we need to make sure the startup type is Automatic , if not, we must change it and make it work properly. If necessary, we save the changes and restart the computer.
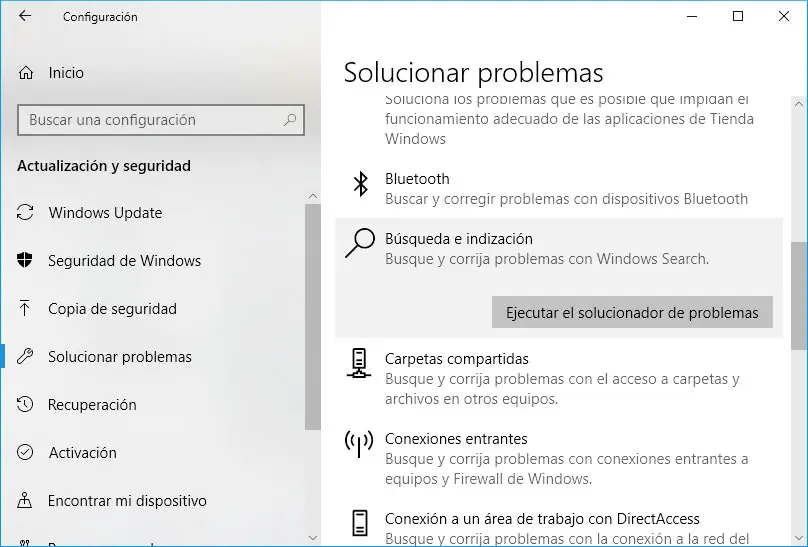
We can also test if the high disk and CPU consumption of SearchIndexer.exe is corrected by running the Search and Indexing Troubleshooter. A tool that Windows 10 offers to users and that can be found on the configuration> Update and security> Troubleshooting> Search and index.
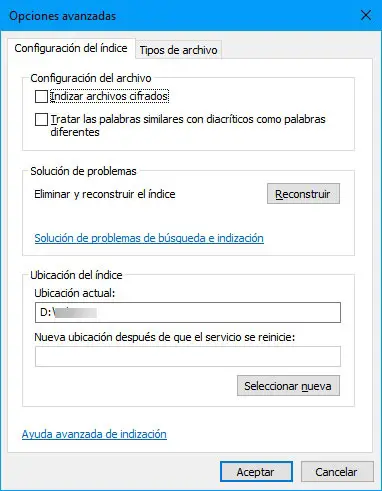
Rebuilding the index can also help us troubleshoot excessive disk and processor consumption by SearchIndexer.exe. To do this, we open the control panel and go to the option Indexing options . Once there, click on the advanced options and in the new window select the tab File types.
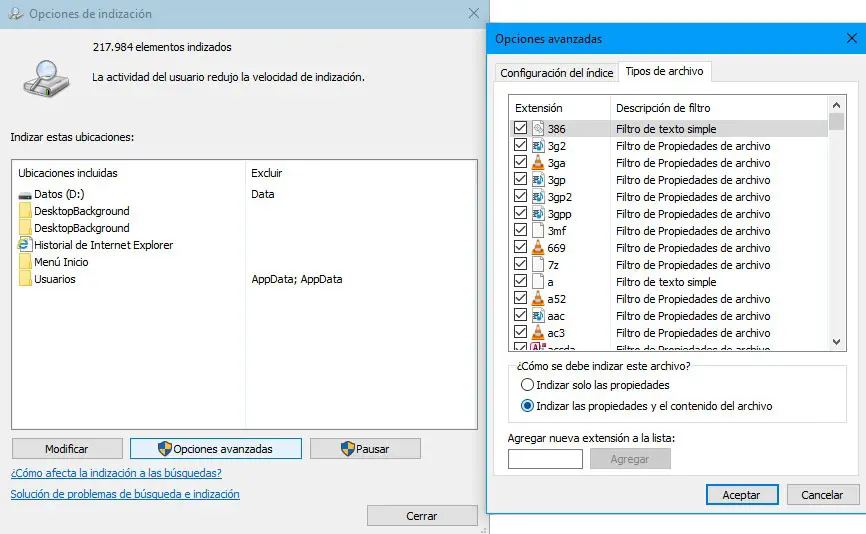
In the lower part we will find two options to indicate how we want the selected files to be indexed in the upper part, where we have to indicate, Index file properties and content . We click on OK, we wait for the process to be carried out then we return to the advanced options in the indexing options to go to the tab Index settings and click on the button Rebuild .
The Windows operating system has a tool which for some may be a great unknown and which in this case can also help us. We will refer to DISM or SFC , two command line utilities that can be of great help in solving problems of excessive disk and CPU consumption on our computer caused by Windows search service.
Hence, we open a command prompt window with administrator permissions and run the command SFC / scannow . This command will scan our system for some errors in Windows files and if found corrupted ones it will perform recovery from a previous version of it. After the process is complete, we restart the computer and again open a command prompt window with administrative permissions.
Now what we're going to do is run the following commands one by one:
Dism / Online / Cleanup-Image / CheckHealth Dism
/ Online / Cleanup-Image / ScanHealth Dism
/Online/Cleanup-Image/RestoreHealth
Another alternative to resolve excessive disk or CPU consumption is to create a new administrator account in Windows, go to the path C:UsersusernameAppDataLocalPackages and rename the folder Microsoft.Windows.Cortana_cw5n1h2txyewy en adding, for example, .old at the end and re-registering the Cortana package from PowerShell by running the command:
Add-AppxPackage -Path "C: WindowsSystemAppsMicrosoft.Windows.Cortana_cw5n1h2txyewyAppxmanifest.xml" -DisableDevelopmentMode -Register
Then we restart our computer and check if the issues have been resolved or not. Otherwise, we can also prevent Windows Search from indexing our drive.
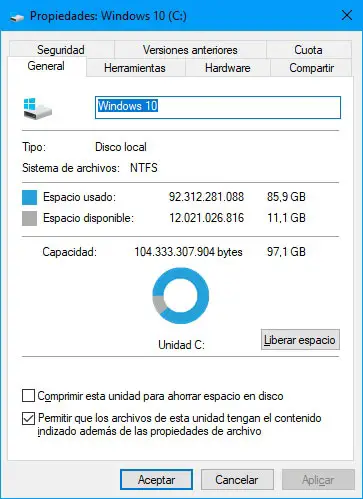
To do this, we go to the file explorer and in This computer and we right click on our disk drive to enter its properties. There, in the tab General , we find the box Allow files on this device to index content in addition to file properties , which will be the one we need to uncheck to prevent Windows Search from indexing our unit.
We can also choose to disable Windows 10 search index , which we can do from the service manager. Therefore, we go to the Services window, search for Windows Search and clicking on this service with the right mouse button we go to its properties. In the window that appears, we select the start type of this service as disabled and save the changes. For the changes to take effect, we will need to restart the computer.