How to activate and use Instagram Shopping to sell products?
Social networks have taken on a great importance lately, especially in 2020 . Within its spaces, we not only share our lives, but we can also carry out commercial transactions from its platform .
grace to the last update of the social network Instagram , users were fascinated by the novelty of Instagram Shopping. Within this new tool, you have the possibility to tag different types of products that you market in order to transform your Instagram profile into your small virtual store.
In this way, your users will be able to access the catalog of products that you offer and be identified with the material you have, so that you can receive a lot of income through your account . If you want to know more, in this article we explain the details of what is now called InstagramShopping.
How does Instagram Shopping work?
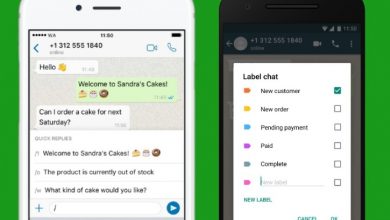
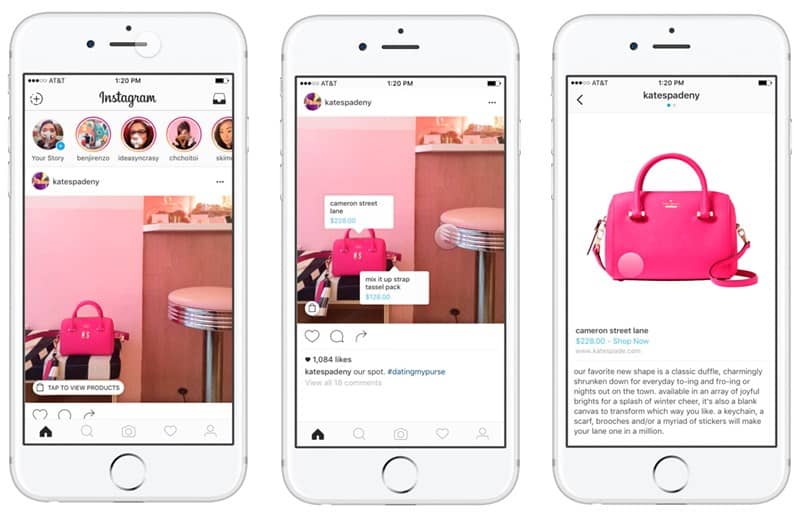
Usually when you already have all the settings for your matters or a mini virtual store, it will not be necessary for customers to start arriving. When they reach your Instagram page, the first thing to do is grab the photo of the product they like the most.
After that, its price and a small description will be pre-labeled on the product, which will appear at the user , once he has clicked on the article he has selected. In addition to the price, it will also be reflected, the purchase options and the payment methods.
If they tap on the product they want to purchase, the page will take them directly to the online store, where they can complete the purchase.
What are the requirements for Instagram Shopping?
- To start the products you are going to market, they must be integrated into the platforms previously such as WooCommerce .
- It is important that you have the latest version of Instagram installed
- Have a business profile on Instagram
- Company page on Facebook
- Have the products available in a catalog within Facebook
- At least 9 photos in your feed
Step by step installation
- To start, you need to create your account within the Facebook business administrator and then link your account to that of your fan page.
- Once you have created your site by the administrator, you need to proceed with the activation of your website within the Facebook platform. For this you also need to start adding the products that you will be selling manually and then proceed to the activation of your website.
- As you have already added a product, this is where you will start to add each of them manually, and after that you will start with configuring the catalog of all your products. When you have added all the products that will go into your catalog, you must return to your main Facebook page and enter the »tab Store That you previously added.
- From there, it is important that you start to agree to the policies and conditions described for the merchants and then click on the button « Continue ».
- After that, you need to select the option “Pay on another website” and continue with the selection of your local currency so that the users know the payment methods and how the transaction is done. You click " Save " and that's all.
- You are ready to finish, and here you need to proceed to compose the welcome message that your users will read, press the "Add a product" button and that's all.
- Finally, you just need to add the basic information of your products and wait for the system to validate it.
And you are ready to start your company and all your customers start to rain.