How to apply a screen protector without leaving bubbles step by step

With the advancement of the technological world, some smart devices like our mobile phones have become some of our most precious treasures. That is why the mobile phone industry has focused on manufacturing and marketing excellent quality products, which have high standards of resistance to external factors such as heat and water.
However despite these efforts. The risk of damaging our phone in the event of an accident is still latent. Too! For this, a protection tool additional has been created , which they called screen saver. That it is nothing more than a kind of tempered glass layer responsible for cushioning or reducing the impact in the event of a fall.
How to apply a screen protector without leaving bubbles?
Glass or tempered glass is a safety tool that was initially implemented in vehicles, since in an accident. The shards produced by the impact caused serious injuries to the occupants. However, over the years, users have seen the option of applying this tool on mobile devices.
This is how the screensavers have started to be used . This is an effective method for the care of devices. Since it offers greater resistance to screens.
Screen protectors are a thin layer of glass which has been subjected to strong stress to increase its strength. For this, thermal or chemical methods are used which betray one side of the glass, while the other is compressed. The result is a material that ensures the safety of any device it covers.
Steps to Apply Screen Protector Without Leaving Bubbles
The first step is to select a screen protector made of impact resistant material, make sure the measurements match your device or are specially designed for that model.
You must clean and disinfect your hands before placing the screen protector, to prevent sweat or anything on it from staining and leaving fingerprints on the screen, making the result unsightly.
Another important action is to have all the items you are going to use when putting on the protector completely clean, this includes the packaging and the worktable. Make sure the solvent type to use is gentle. Some protectors come with two application wipes. One wet and one dry. You must pass them consecutively. You can use two methods, depending on your pulse or your practice.
The first is simpler and consists of place the device horizontally and align the screen protector to look like the location.
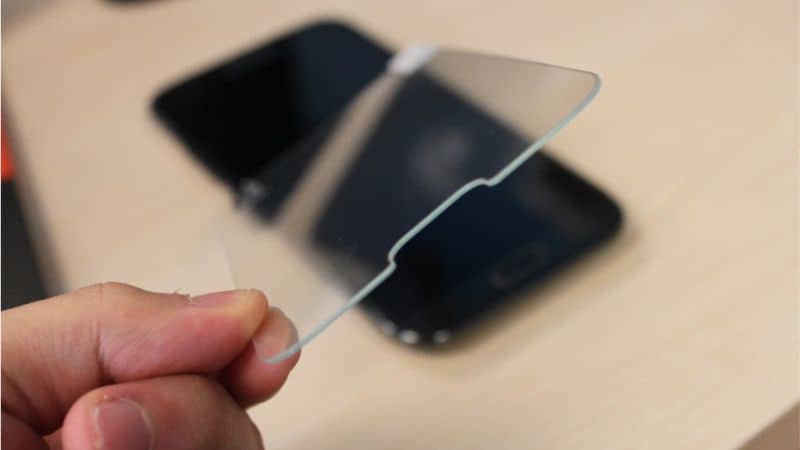
Then you have to carefully peel off the tab from the adhesive without touching the internal spaces to avoid staining them. Place the screen protector very slowly from bottom to top and as you paste it, it can be tablet up to prevent air from being encapsulated.
In case there are any bubbles, you must use a flat object such as a card or identifier which is firm. With it, you will evacuate the air horizontally on the sides (be careful not to scratch the protector).
Another method to remove bubbles
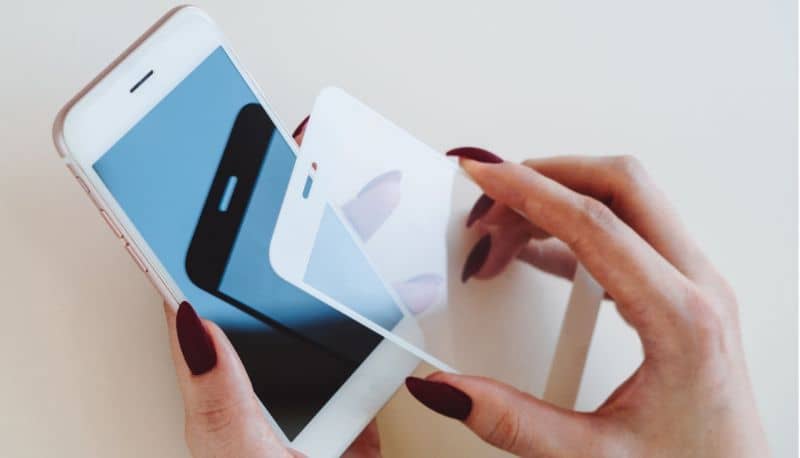
Another way is the hinge trick and is to align almost perfectly the device with the screen protector and attach the protector to the back of the device using adhesive tape.
The protector should look like a cover that covers the screen of the device and there should not be any uncovered space, and the tape should hold the protector firmly. Once this has been done, proceed to carefully peel off the protector tab without touching the center to avoid smudging.
Now evenly touch the device to the protector. Make sure that when performing this move all parts are touched. To avoid leaving an air gap. You can remove air bubbles with a flat object such as a rule or a card or badge.