How to turn off the Microsoft shared experience in Windows 10?
There are a large number of functions that Windows has added to its catalog throughout its updates. Some leaving and some changing, this time it's all about shared experiences . If you don't know what they are or if you do, but want to turn off the experiences shared in Windows 10, read on.
What are Microsoft Shared Experiences?
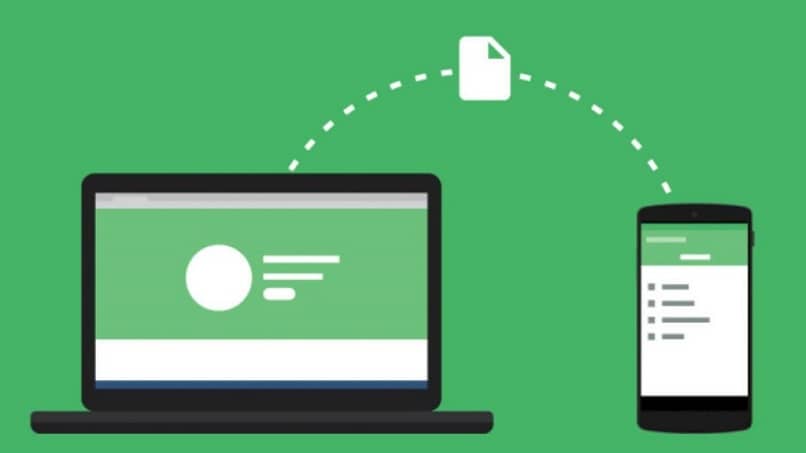
This is an addition to what is called the Creators update, including the main goal is to be able to perform the same task on different computers through a single account. Windows Creators Update is one of the biggest updates from Microsoft that allows better connectivity between users. With this function, you can also include Android devices to share your files.
Microsoft has eliminated the Windows Home group, but instead put this function, with which, share, links, files, applications and send messages. This, synchronizing the main computer with the other devices you want to add. This function makes data transmission easier and safer via Bluetooth or Wi-Fi networks.
After Microsoft eliminated the Hohar group, users of this operating system began to use Near Share to share files and records.
This project allows device compatibility , which is useful if you need or want to finish files or work on another computer. As long as it is configured in shared experiences. This is very useful for small design or creative businesses.
Shared experiences are first activated in the system. But, if we don't want our computer to be detected by third parties within the same network, we can turn off the shared experience in Windows 10 very easily.
In addition to the shared experiences of Windows 10, Microsoft also created Office Online , a system that lets you work from the cloud with programs like Word, Excel, and PowerPoint to share files.
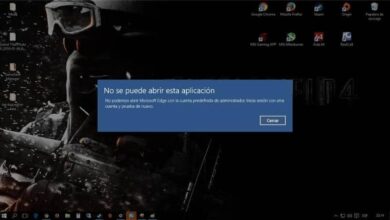
Be surprised to find that disabling shared experience in Windows 10 is super easy
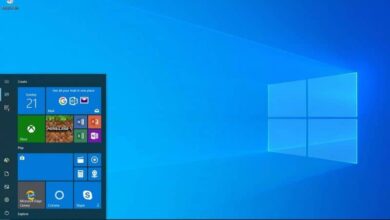
Go to "Settings" and in the menu "System" , scroll up to the option “Shared experiences”. While you're at it, you just need to flip the switch to turn off the shared experience in Windows 10 or turn it on in this case.
The option "Share between devices" Allows the inclusion of other applications from third-party devices, such as mobile phones or tablets. There is also the option "Everyone nearby" which allows to extend the reach.
Another method to turn off the shared experience in Windows 10 is to do it from the Windows registry. Open a registry window and with the command "Regedit", in a window "Execute", go to the path "HKEY_CURRENT_USER \ Software \ Microsoft \ Windows \ CurrentVersion \ CDP".
With this registry key you will find the following qualities, "CdpSessionUserAuthzPolicy", "NearShareChannelUserAuthzPolicy" et “RomeSdkChannelUserAuthzPolicy”. To disable experiments, you must give a value of 0 to the first and last command and a value of 0 to the second. Either way, if you want to turn it off, you'll need to restart your computer first to see the results.
Disable experiments via group control
With this option, this function is disabled for all users of the system. This method is useful for administrators and network managers. From the Start menu, find "Gpedit.msc" and right-click, click "Execute as administrator".
Then go to "Computer Configuration", "Administrative Templates", "System" and "Group Policy". Look for the option "Continue the experiments with this device " in the right panel.
This role is the one that takes care of managing the integrity of shared experiences in the operating system. Select "Disabled" And click "Apply" to make the changes. Restart the system immediately to take effect.
Disable shared experiences from the registry
If you cannot access the above method, get the same result through the system registry. Again, on the Start menu, search for "Regedit" et make right click. Select "Execute as administrator" to open the registry as an administrator.
Paste the following command "Hkey_local_machinensoftwarepoliciesmicrosoft {windows> policies". Locate the folder "System" on the left side and in the main panel, with a right click, select "New". Double-click on the displayed values and make sure they are zero. This way you will be able to deactivate shared experiences.
Maybe after installing or updating Windows Update, you have space problems and you have to free it up .