How to Create and Design an Invitation Card in Adobe Illustrator
Would you like to create an invitation card in Adobe Illustrator? If you are an event planner, guests like to have a reminder of how important their presence is to the event host; And what better than a invitation card in Adobe Illustrator which indicates the day, the hour and the place?
For this reason, we will teach you here how to create an invitation card in the easiest and fastest way, by applying simple digital design techniques. Without further ado, let's get started.
Artboard for an invitation card in Adobe Illustrator
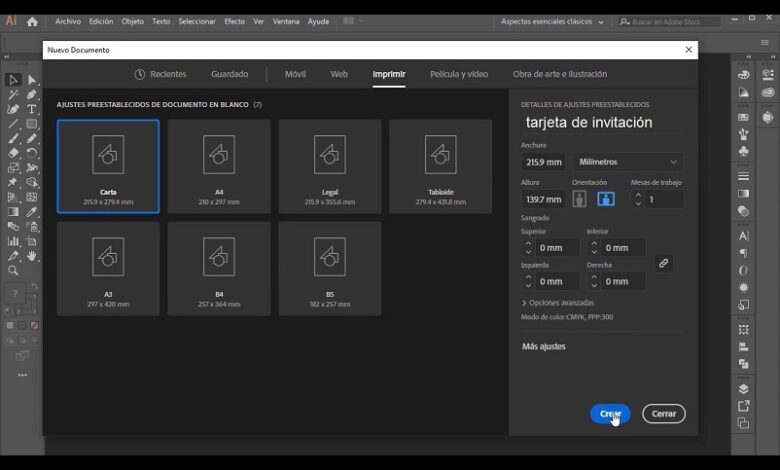
The first thing to do is to create a document by clicking on the “File” option located in the top bar, then clicking on the option that says "New" . Therefore, a window will open where you will need to select the option "to print". É sta will indicate the different design sizes that have the program. Here you will choose the one that best suits your needs.
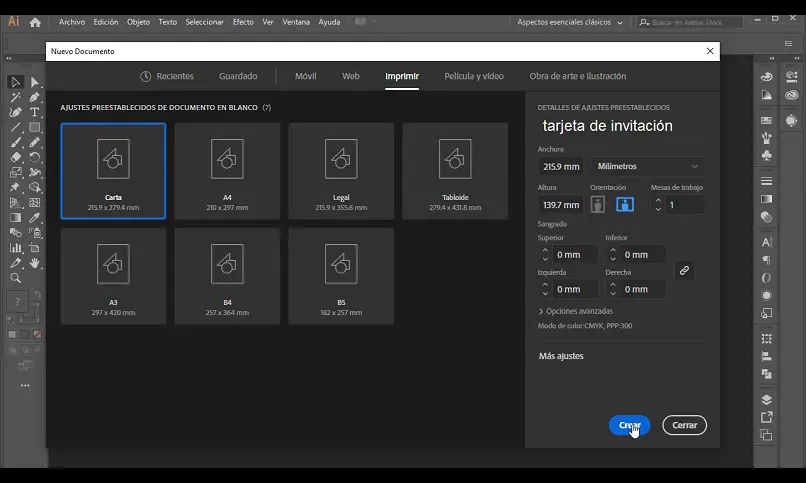
You should also place the document name under: "Details of the predefined parameters" , then click on "create" and the workplan will open automatically.
Use the "figures" tool located on the left bar, create a rectangle that it is put at the work table , then press Ctrl + 2 for the layer you end up with move to create with the figure; and in the "colors" option on the right bar, select one for the background.
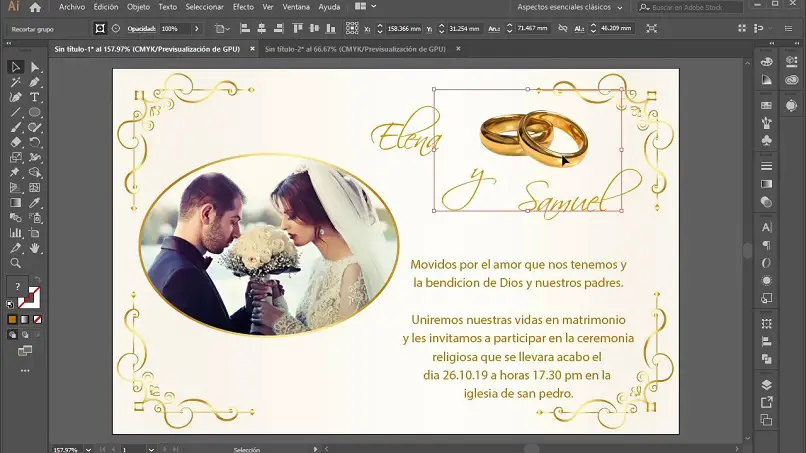
Decorative frames
To make the decorative frames, use the tool "brush" on the left bar; with this you can make a figure at your discretion. To join all the lines, select them all, right click and click on “Group”.
Now, keeping the "Alt" key pressed, we will drag the figure 3 times on the sides to make copies, finally we organize them in the corners of the rectangle and to correct them again we press Ctrl + 2 .
Insertion of images for professional design
To make the design attractive, you need to click on "File" and select "Open"; There, a window will appear, you will search for one or multiple images to add to the invitation card.
Then adjust the size according to your needs, leaving a fixed “click” in one of its corners, drag it towards the center to reduce it or out to increase it. Then position the image where it suits you best.
If you want to give an attractive shape to your image on the worktable, choose the “figures” option again, insert the shape that suitable better to design of your invitation card. Once the figure is inserted, correct a click from outside the work surface.
You can even convert an image to vector with Adobe Illustrator ; With it, you can create a personalized and vector object to decorate your invitation card.
Shade the picture
To shade the image area and the figure as a whole, we right click and select » create clipping mask «.
With this, the image will be in figure limits . Finally, press Ctrl + 2 to correct the operation.
Insert text in the invitation card
The last and most important thing to add is the content of the text. Obviously we have to know how use the Adobe Illustrator text tool , to can insert reason, date, time and place .
To do this, select the “Text” option located in the left bar. Place it in the most suitable place on the card to write the sentence. Then, in the option " Character: Which is in the right bar, choose the best type of font and it will be ready.
In addition, you can easily create arrows or curved lines in Illustrator . With this, you will give the final touch that your invitation card needs, to have a professional style. And don't forget to put preview or preview mode in Illustrator before recording; that way you will know what your invitation card will look like.
So you can easily and quickly create any type invitation card in Adobe Illustrator . If you liked this post, don't forget to share it and leave your comment, because your opinion motivates us to provide you with quality information.